AGMS Gateway Custom Email Notifications
Receipts and notifications, such as transactions, recurring billing payments, and online invoicing reminders, can automatically be emailed to customers, the business, and/or to an email address specified by the business. Email receipts will be triggered and sent for each successful and failed transaction, except for printed receipts.
Custom fields can be included in email receipts and notifications to show transaction details. A full list of custom fields can be found in the Available Fields tab. Visit the Customize tab to learn how to setup and use custom fields.
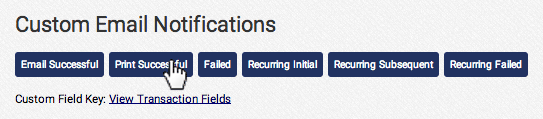
Available Email Receipts and Notifications
| Template Name | Trigger |
|---|---|
| Email Successful | Successful transaction completes |
| Print Successful | Successful transaction completes |
| Failed | Failed transaction attempt |
| Recurring Initial | Initial Recurring Billing successful transaction completes |
| Recurring Subsequent | Subsequent Recurring Billing successful transaction completes |
| Recurring Failed | Failed Recurring Billing transaction attempt |
| Online Invoicing Initial | Online Invoicing customer initial successful transaction completes |
| Online Invoicing Subsequent | Online Invoicing customer subsequent successul transaction completes |
| Online Invoicing Failure | Online Invoicing customer failed transaction attempt |
| Online Invoicing Reset Password | Online Invoicing customer requests to reset password |
| Online Invoicing Reminder Email | Online Invoicing customer has outstanding invoice |
AGMS Gateway Available Fields
Make sure to enclose all custom fields in { }, for example {amount}. Custom fields are replaced with transaction data, so {amount} would render as the amount for a transaction. Learn how to use transactions fields in email notifications and receipts in the Customize tab.
Basic Transaction Fields
| Field Name | Email Format |
|---|---|
| Transaction Type | {transactiontype} |
| Payment Type | {paymenttype} |
| Transaction Amount | {amount} |
| Subtotal | {subtotal} |
| Tax | {tax} |
| Shipping | {shipping} |
| Order Description | {orderdescription} |
| Order ID | {orderid} |
| PONumber | {ponumber} |
| Transaction ID | {transactionid} |
| Processor Name | {processorname} |
| Processor Nickname | {processornickname} |
| IP Address | {ipaddress} |
Credit Card Transaction Fields
| Field Name | Email Format |
|---|---|
| Credit Card Number security applied |
{ccnumber} |
| Credit Card Expiration Date MMYY |
{ccexpdate} |
| Card Type | {cardtype} |
Check/ACH Transaction Fields
| Field Name | Email Format |
|---|---|
| Check Name | {checkname} |
| Check Routing Number security applied |
{checkaba} |
| Check Account security applied |
{checkaccount} |
| Account Holder Type | {accountholdertype} |
| Account Type | {accounttype} |
| SEC Code | {seccode} |
SAFE Transaction Fields
| Field Name | Email Format |
|---|---|
| SAFE ID | {safe_id} |
Customer Billing Fields
| Field Name | Email Format |
|---|---|
| Billing First Name | {billingfirstname} |
| Billing Last Name | {billinglastname} |
| Billing Company | {billingcompany} |
| Billing Address 1 | {billingaddress1} |
| Billing Address 2 | {billingaddress2} |
| Billing City | {billingcity} |
| Billing State | {billingstate} |
| Billing Zip | {billingzip} |
| Billing Country | {billingcountry} |
| Billing Phone | {billingphone} |
| Billing Phone Formatted xxx-xxx-xxxx |
{billingphone-formatted} |
| Billing Fax | {billingfax} |
| Billing Fax Formatted xxx-xxx-xxxx |
{billingfax-formatted} |
| Billing Email | {billingemail} |
| Billing Website | {billingwebsite} |
Customer Shipping Fields
| Field Name | Email Format |
|---|---|
| Shipping First Name | {shippingfirstname} |
| Shipping Last Name | {shippinglastname} |
| Shipping Company | {shippingcompany} |
| Shipping Address 1 | {shippingaddress1} |
| Shipping Address 2 | {shippingaddress2} |
| Shipping City | {shippingcity} |
| Shipping State | {shippingstate} |
| Shipping Zip | {shippingzip} |
| Shipping Country | {shippingcountry} |
| Shipping Email | {shippingemail} |
| Shipping Carrier | {shipping_carrier} |
| Tracking Number | {tracking_number} |
Custom Fields
| Field Name | Email Format |
|---|---|
| Custom Field 1 | {custom_field_1} |
| Custom Field 2 | {custom_field_2} |
| Custom Field 3 | {custom_field_3} |
| Custom Field 4 | {custom_field_4} |
| Custom Field 5 | {custom_field_5} |
| Custom Field 6 | {custom_field_6} |
| Custom Field 7 | {custom_field_7} |
| Custom Field 8 | {custom_field_8} |
| Custom Field 9 | {custom_field_9} |
| Custom Field 10 | {custom_field_10} |
Response Fields
| Field Name | Email Format |
|---|---|
| Status Code | {status_code} |
| Status Message | {status_msg} |
| Transaction ID | {trans_id} |
| Transaction Create Date | {createdate} |
| Authorization Code | {auth_code} |
| AVS Code | {avs_code} |
| AVS Message | {avs_msg} |
| CVV2 Code | {cvv2_code} |
| CVV2 MSG | {cvv2_msg} |
| Order ID | {responseorderid} |
| SAFE ID | {responsesafeid} |
AGMS Gateway Customized Email Notifications
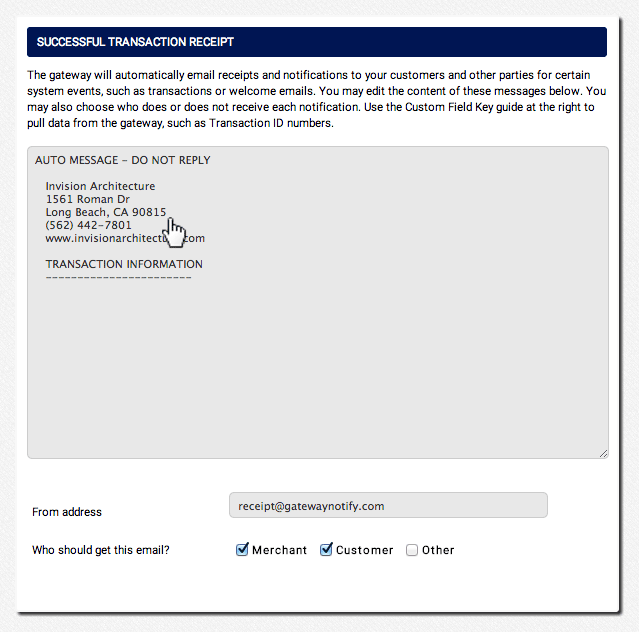
All email notificaitons and receipts have a default message that can be easily customized. This short guide demonstrates how to setup successful transaction receipts for both email and print.
Successful Transaction Email Receipt
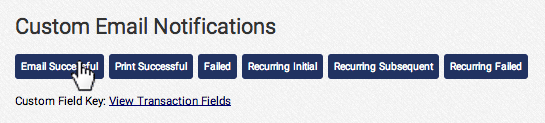
- In the Custom Email Notification section of the AGMS Gateway, click Email Successful
- Insert in the business name, location, and contact information
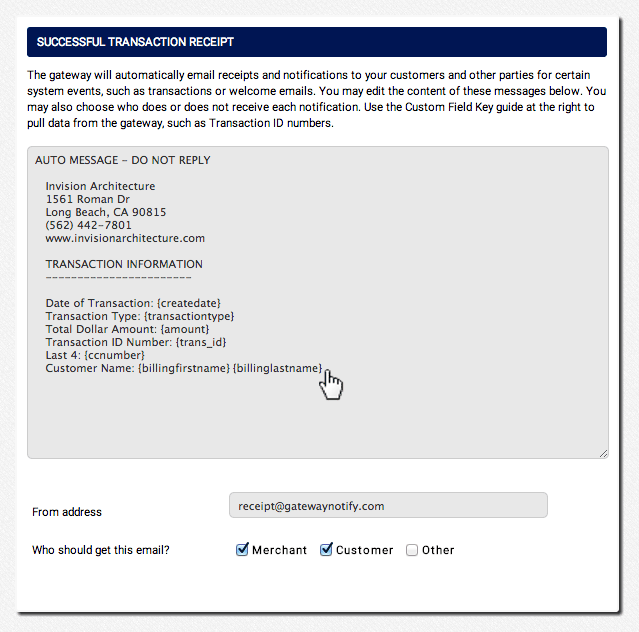
- Insert transaction details with corresponding custom transaction fields to pull in customer transaction information. For example, by inserting {amount} the amount of the transaction will be shown where {amount} is present.
- The default email from address can be left as is, or businesses can update the from address so that customers can reply directly to the email receipts and notifications
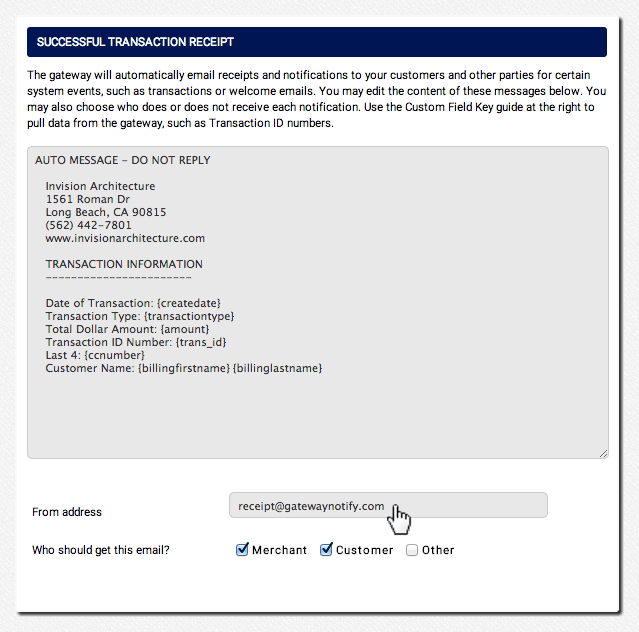
- Select the recipients of the email receipt. To add another email address to the receiving party, check Other and supply the additional email address to receive the receipt

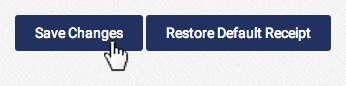
- Click Save Changes

Successful Transaction Printed Receipt
- In the Custom Email Notification section of the AGMS Gateway, click Print Successful
- Insert in the business name, location, and contact information
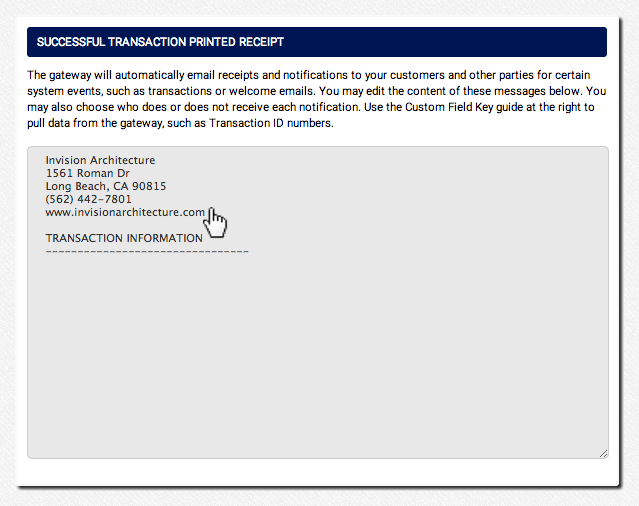
- Insert transaction details with corresponding custom transaction fields to pull in customer transaction information. For example, by inserting {amount} the amount of the transaction will be shown where {amount} is present.
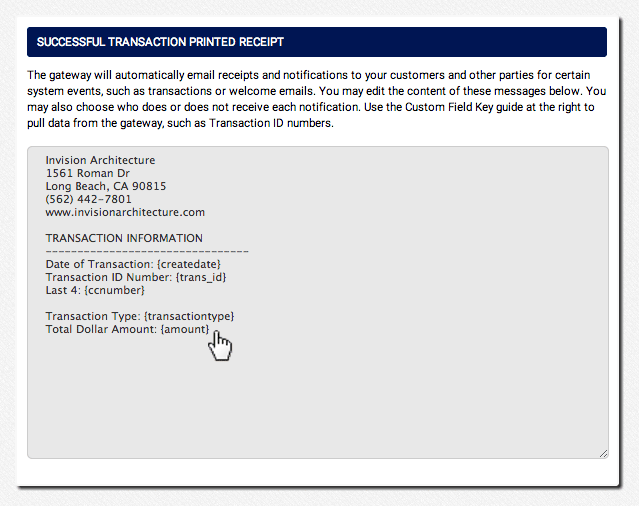
- Capture customer signatures by simply typing "X__________________________________" on one line with the customer's name on the next following line using the custom transaction fields. {billingfirstname} and {billinglastname} will be replaced with the customer's first and last name from a transaction.
- Click Save Changes